Create users independently of technical support in the “Client portal”.
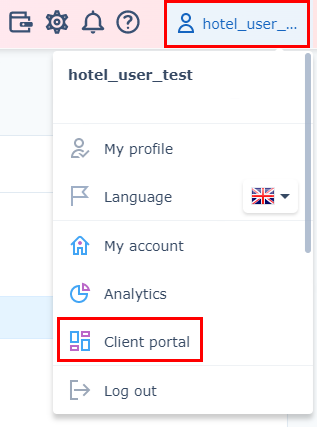
1. Click on your login at the right top corner. Select the “Client portal” section. The “Users and rights” section will open.

2. Click on the “Add user” button.
3. Fill in the required fields:
User’s unique email.
Come up with a login. By default, the user’s email is set as a login. You can change it if you wish.
Indicate the employee’s first and last name.
4. Select the access right level:
Access to all the components of the platform and Client Portal — full access to all the components settings of the platform, accounting documents and users management.
Access to all the components — access to all the connected TravelLine components. It has no access to the “Client portal”.
For accounting — access to all the menu sections related to accounting in the TravelLine components and the “Client portal”.
For administrator — access to menu sections meant for the booking and availability management.
For marketing — access to the “Marketing” menu section.
For housekeeping — access to the “Housekeeping” section, viewing brief information on bookings and several reports.
5. For the “Accommodation facility”, tick what accounts the person should have access to. There will be a list of IDs under one Agreement.
6. Click on the “Create” button.
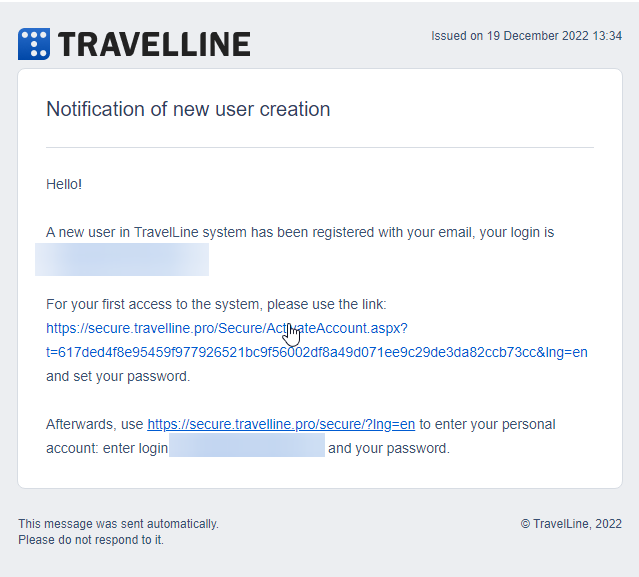
An email on the new user creation will be sent to the email address you indicated. For the first login, click on the link and create a password.

Learn more on how to manage the “Users and rights” section.
